You can download the Otoplo Wallet from the official website otoplo.com.
Follow these simple steps to create and manage your HODL Vault using the Otoplo Wallet.
Step 1: Setup Your Wallet
Create a new wallet or open an existing one.

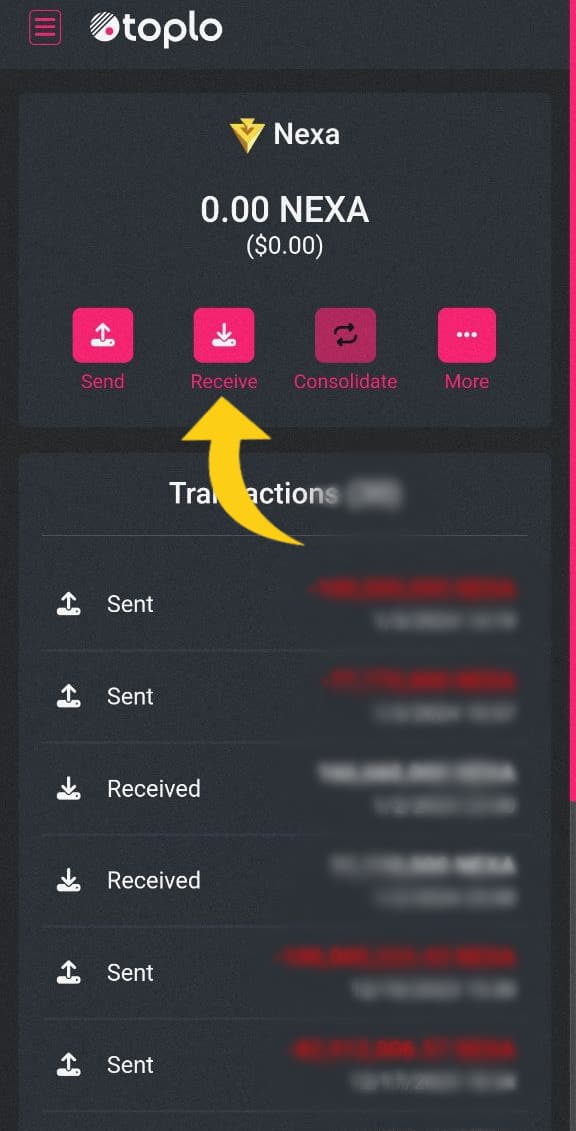
Step 2: Fund Your Wallet
Receive some coins into your wallet.
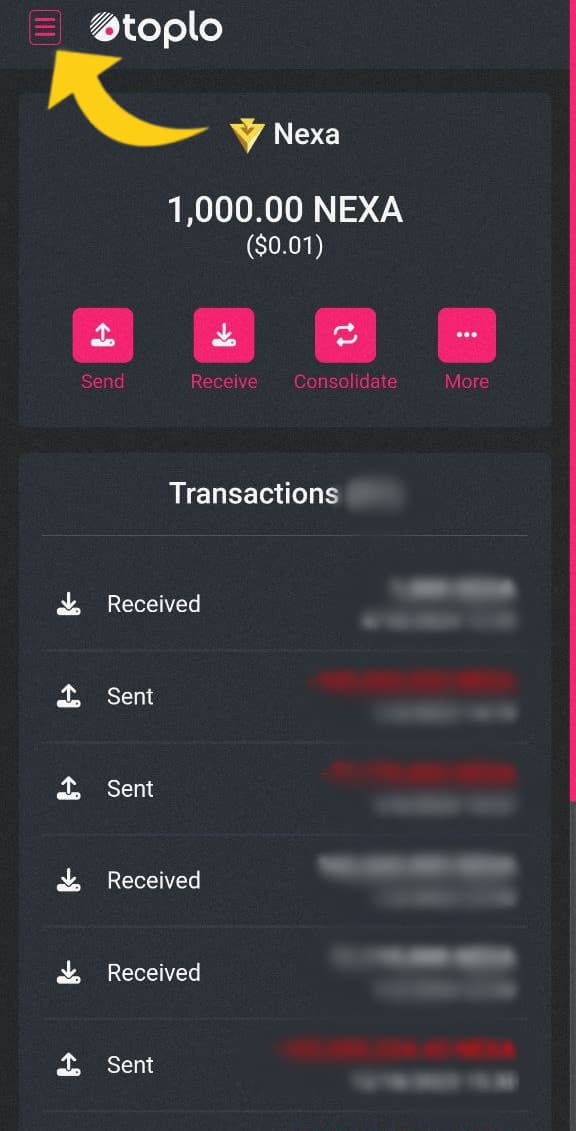
Step 3: Access the Menu
Open the wallet menu.
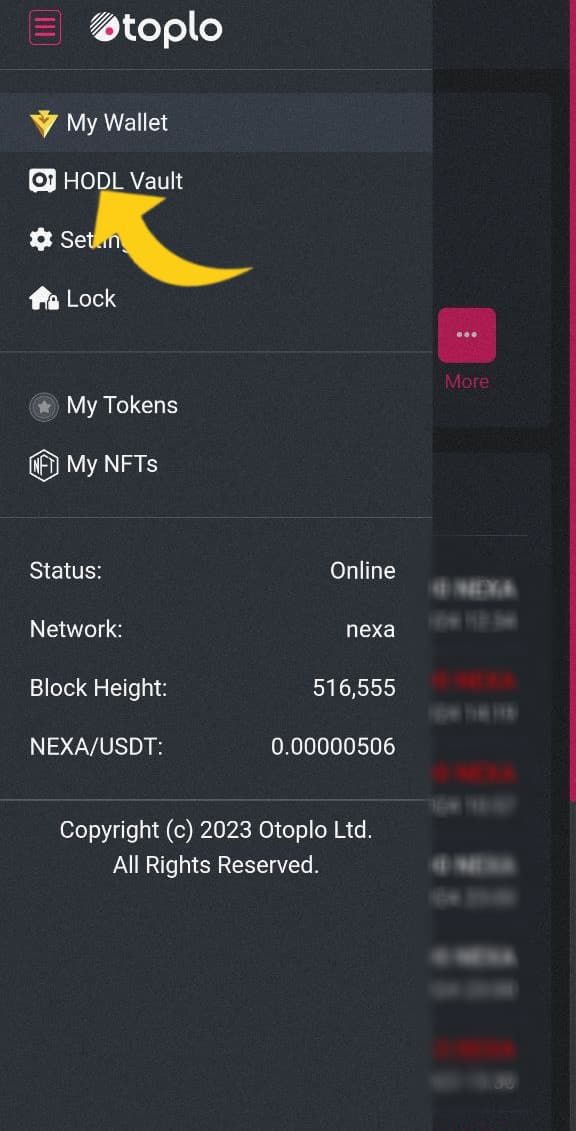
Step 4: Navigate to HODL Vault
Select the ‘HODL Vault’ option from the menu.
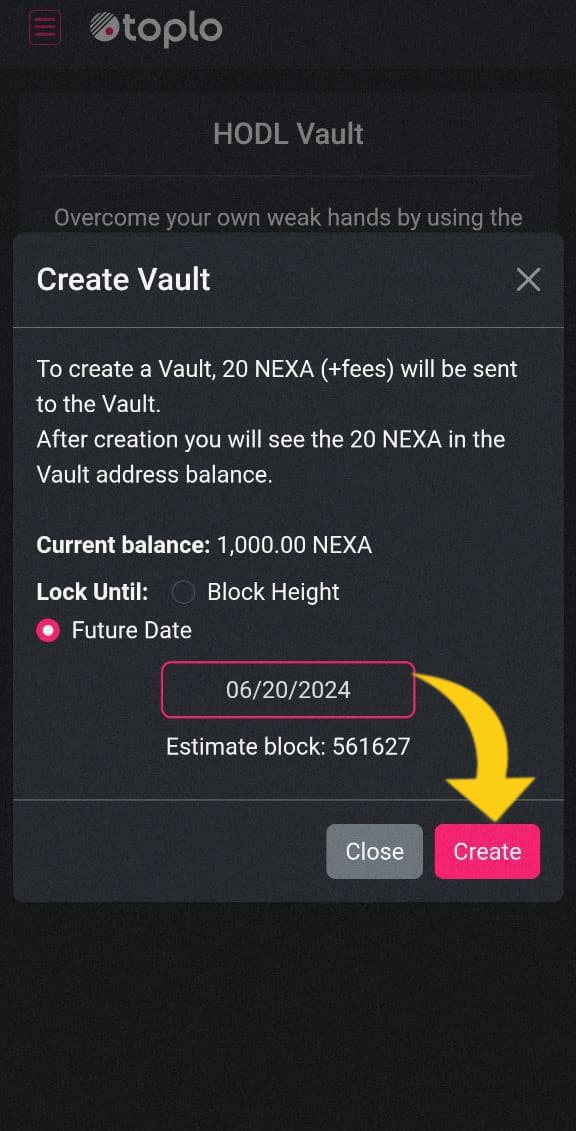
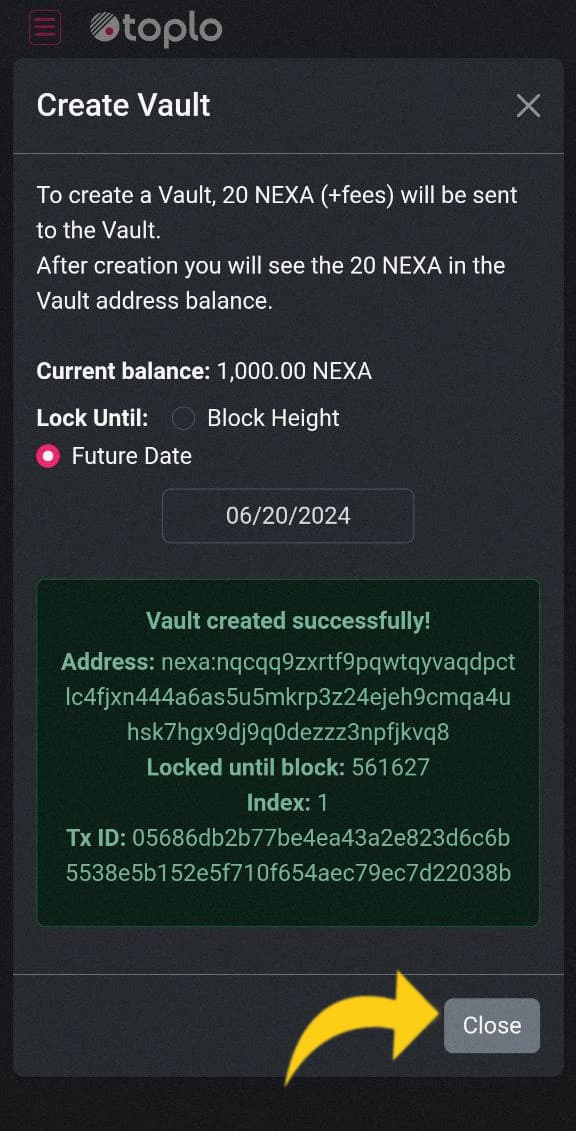
Step 5: Create a New Vault
Initiate the creation of a new vault.

Step 6: Set Parameters
Choose a date or block number for the vault and click ‘Create’.
Step 7: Security Confirmation
Enter your password to confirm the action.

Step 8: Vault Creation Confirmation
Congratulations, your new HODL Vault has been created!
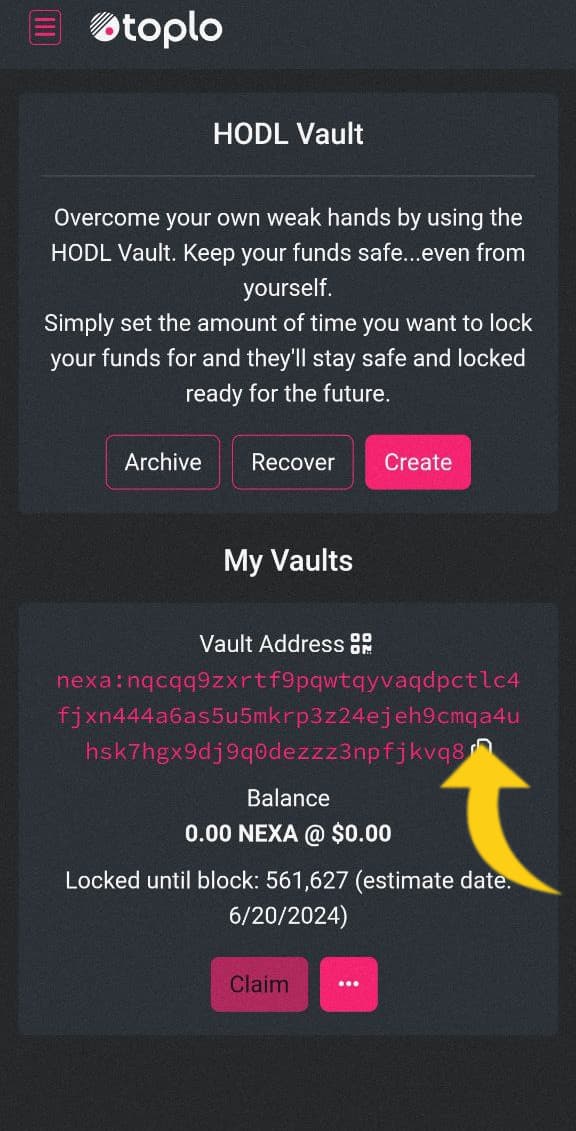
Step 9: Obtain Vault Address
Copy the address of your new HODL Vault.
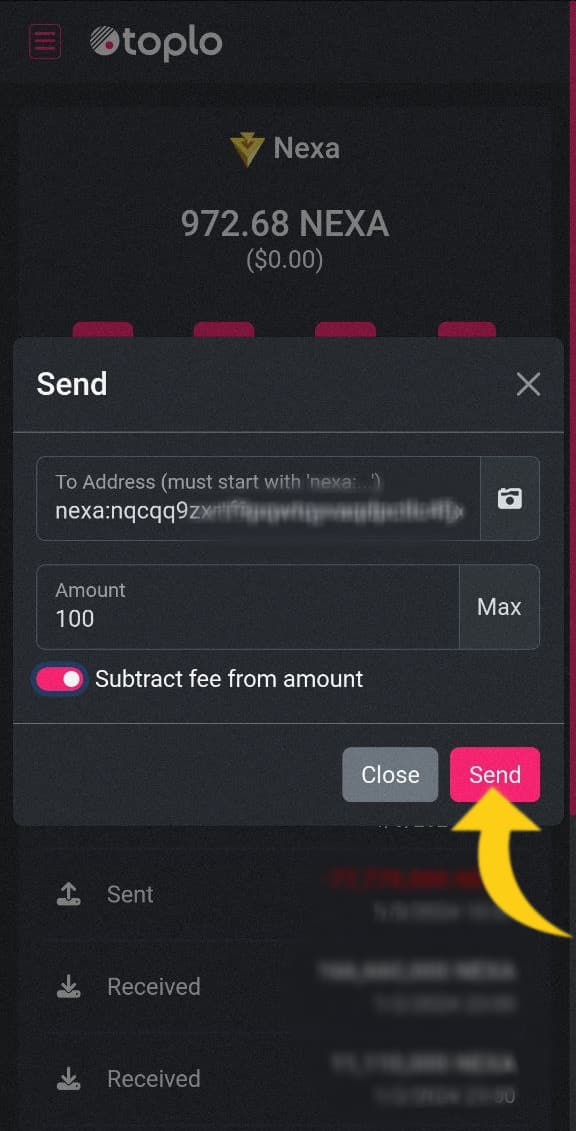
Step 10: Fund Your Vault
Return to the main menu to ‘Send’ coins to your HODL Vault.
Step 11: Confirm Transaction
Enter your wallet password again to confirm the transaction.
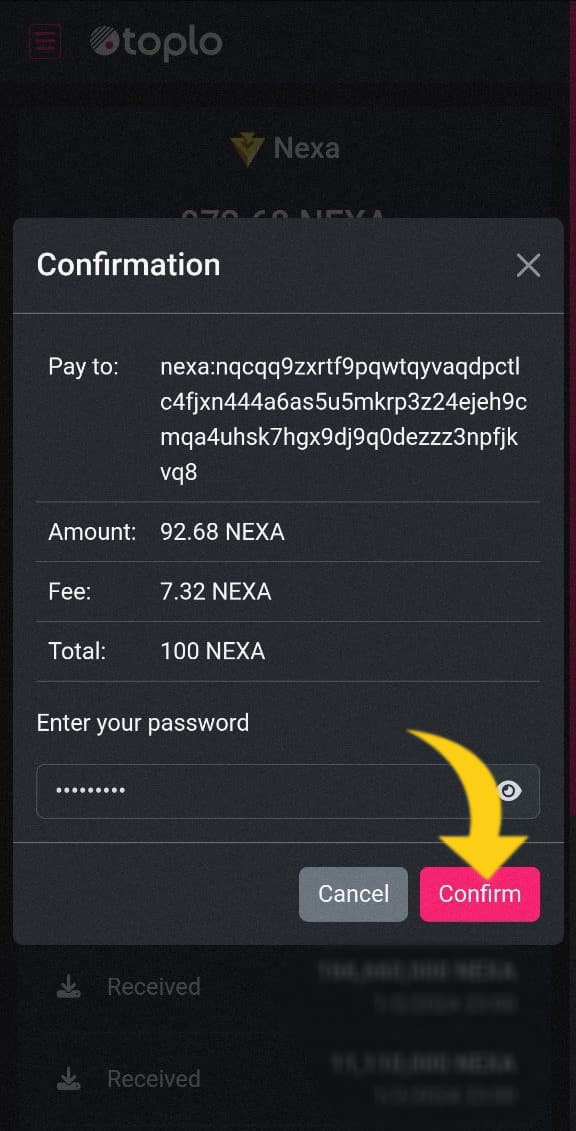
Step 12: Transaction Success
You have successfully sent funds to your HODL Vault.

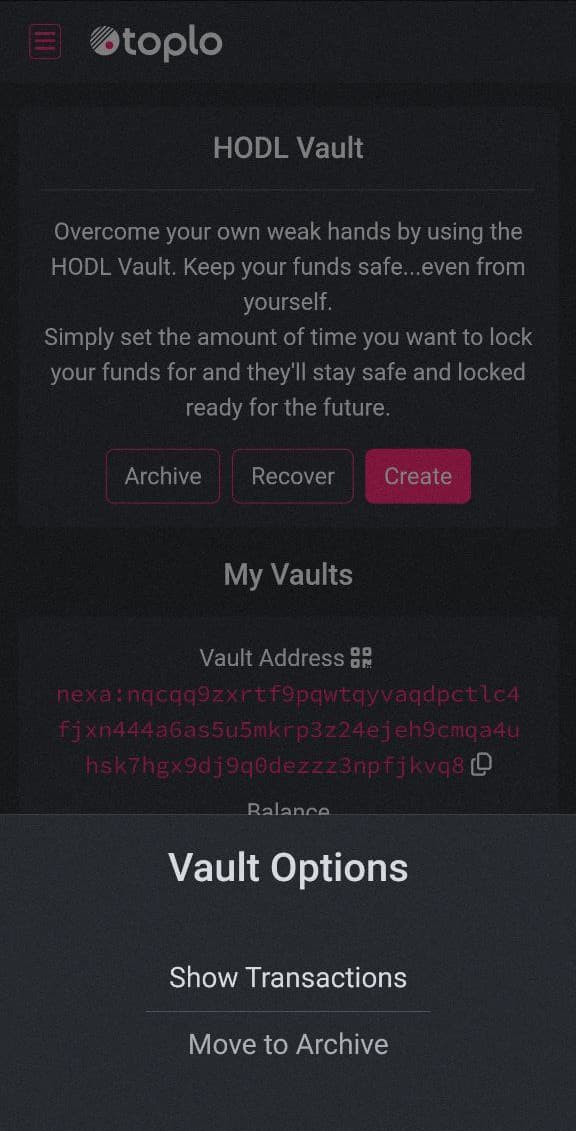
Step 13: Manage Your Vault
View and manage your vault as needed.

Step 14: Additional Options
You’re all set! You can now check the transaction history or move it to the archive.
Important Note:
Always download the latest version of Otoplo Wallet from official sources to ensure security and functionality.