How to use NexaTools and Keeper Contracts with NexScript on the Nexa blockchain. It includes instructions for generating wallets, signing and verifying messages, compiling and deploying smart contracts, and using them for practical applications like creating a piggy bank or a simple paper wallet.
Nexa Tools
NexaTools is a set of tools for generating wallets and signing/verifying messages on the Nexa
blockchain. How to get started:
1. Install Node.js: Ensure you have Node.js installed on your system. Download it from Node.js
Official Website.
2. Download or Clone the NexaTools Repository:
- Visit the NexaTools Repository.
- Clone the repository or download it as a ZIP file.
- Open a command line or terminal and navigate to the downloaded nexatools directory.
3. Install Dependencies: Run the following command to install the necessary Node.js packages:
npm i
4. Generate a Single Address Wallet: To generate a wallet (including a private key WIF, address, compressed public key, and public key
hash), run:
node wallet.js
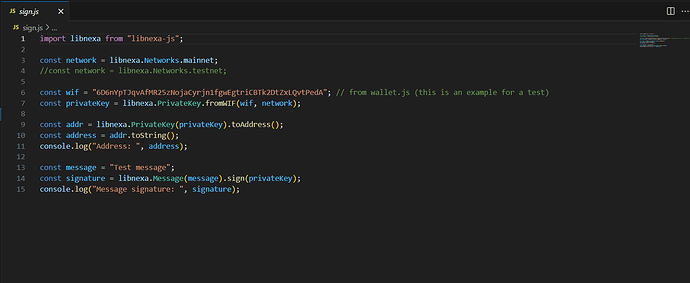
5. Sign a Message: To sign a message using the wallet, use:
node sign.js
6. Verify a Signed Message: To verify the signature of a message, run:
node verify.js
7. Reference Libraries:
- Uses
libnexa-jsfor core functionalities.
Keeper Contracts
Keeper Contracts are simple NexScript-based smart contracts designed for basic use cases like creating a piggy bank or a simple paper wallet. Here you can see how to compile and deploy these contracts.
1. Download and Install Node.js: Ensure Node.js is installed, as described in the previous section.
2. Clone or Download the Keeper Repository:
- Visit the Keeper Repository.
- Clone the repository or download it as a ZIP file.
- Open a command line (e.g., Visual Studio terminal) and navigate to the downloaded keeper
directory.
3. Install NexScript Compiler Globally: Install the NexScript compiler globally by running:
npm install -g @nexscript/nexc
4. Install Project Dependencies: Inside the keeper directory, run:
npm i
5. Compile the Contract: Compile the smart contract to generate a deployable JSON file. Choose between Keeper.nex or Keeper2.nex:
nexc ./Keeper.nex --output ./Keeper.json
nexc ./Keeper2.nex --output ./Keeper2.json
6. Generate Wallet Details: Use NexaTools to generate a private key WIF, address, public key, and public key hash (pkh). Save these details:
- Public Key: Used as a contract argument.
- Public Key Hash (pkh): Used to verify the public key.
- Private Key: Used to sign the transaction.
7. Prepare Contract File: Open Keeper.js and paste the generated variables (WIF, address, public key, and pkh) into the appropriate sections. Modify the script by adding or deleting comments as needed.
8. Deploy the Contract: To create a new contract, execute the following command (each new WIF creates a new contract):
node Keeper.js
9. Fund the Contract: Save the contract address generated in the previous step and send some Nexa (e.g., 1000 NEX for testing) to this address.
10. Withdraw or Sweep Funds: To withdraw funds from the contract, run:
node Keeper.js
By combining NexaTools and Keeper Contracts, you can generate wallets, sign and verify
messages, and deploy simple but effective smart contracts on the Nexa blockchain. These tools
offer a powerful and accessible way to engage with decentralized finance applications and
experiment with smart contracts.
Get started today by visiting the NexaTools Repository and the Keeper Repository to explore these tools further. Check on official NexScript Playground for more examples and to experiment with smart contracts.
